A vapor barrier is a sheet or coating material installed on basement walls, under concrete slabs, or over crawl space dirt floors to prevent moisture vapor from passing through concrete and soil into the living space. The best vapor barriers in 2026 cost $0.10 to $1.00 per square foot for materials, use polyethylene sheeting rated at 10 to 20 mil thickness, and meet Class I vapor retarder standards with a perm rating of 0.1 or less per ASTM E96.
This guide reviews 5 types of vapor barriers, compares the top products in each category, and explains how to choose the right one for your basement or crawl space.
Moisture vapor moves constantly through concrete basement walls, concrete slabs, and exposed soil in crawl spaces. Even when no liquid water is visible, water vapor migrates from the damp soil side to the drier interior side of your foundation. This invisible moisture raises basement humidity above 60 percent, creates condensation on cold surfaces, feeds mold growth behind finished walls, causes wood rot in floor joists and framing, and produces the musty smell that makes basements uncomfortable.
A properly installed vapor barrier stops this moisture migration at the source. It is one of the most cost-effective moisture control investments you can make, costing $100 to $500 in materials for a typical basement or crawl space and lasting 20 or more years.
For how a vapor barrier fits into a complete waterproofing strategy, see our complete basement waterproofing guide. For crawl space applications, see our crawl space encapsulation guide.
Quick Comparison: Vapor Barrier Types 2026
| Type | Best For | Thickness | Cost / Sq Ft | Perm Rating | Durability | DIY Friendly |
|---|---|---|---|---|---|---|
| Polyethylene sheeting | Basements and crawl spaces (general) | 6 to 20 mil | $0.10 to $0.50 | 0.01 to 0.06 | High (20 years) | Yes |
| Foil-faced poly | Insulated basements in cold climates | 6 to 10 mil | $0.20 to $0.60 | 0.01 to 0.05 | Medium-high | Yes |
| Reinforced scrim poly | High-traffic crawl spaces, full encapsulation | 12 to 20 mil | $0.30 to $0.70 | 0.01 to 0.05 | Very high (25 years) | Moderate |
| Dimpled membrane | Uneven surfaces, basement wall drainage | 10 to 15 mil | $0.40 to $0.80 | 0.5 to 1.0 (higher) | High | Yes |
| Spray-on / liquid | Walls, irregular shapes, crack sealing | N/A (coating) | $0.50 to $1.00 | Varies (0.5 to 2.0) | Medium (10 to 15 years) | Moderate |
Project Cost Estimates
Here is what vapor barrier materials cost for common project sizes. These are materials only. Professional installation adds $1.00 to $3.00 per square foot for labor.
| Project | Square Footage | Material Cost (Budget) | Material Cost (Premium) |
|---|---|---|---|
| Crawl space floor (basic poly) | 800 to 1,200 sq ft | $80 to $250 | $250 to $600 |
| Crawl space full encapsulation (reinforced) | 800 to 1,200 sq ft | $250 to $500 | $500 to $850 |
| Basement walls (poly or foil-faced) | 500 to 800 sq ft of wall | $50 to $200 | $200 to $500 |
| Under new concrete slab | 800 to 1,200 sq ft | $80 to $250 | $250 to $600 |
| Basement walls (dimpled membrane) | 500 to 800 sq ft of wall | $200 to $400 | $400 to $650 |
For complete crawl space encapsulation pricing including labor, dehumidifier, and sump pump, see our crawl space encapsulation guide. For basement waterproofing system pricing, see our basement waterproofing cost guide.
How to Choose the Right Vapor Barrier
Match the Barrier to the Application
Different basement and crawl space situations call for different barrier types. Here is a decision guide.
| Your Situation | Recommended Type | Why |
|---|---|---|
| Crawl space dirt floor, basic coverage | 10 to 20 mil polyethylene sheeting | Most cost-effective, easy to install, meets code |
| Crawl space full encapsulation | Reinforced scrim poly 15 to 20 mil | Handles foot traffic, professional-grade durability |
| Basement walls before finishing | 6 to 10 mil poly or foil-faced | Installs behind framing and insulation |
| Basement walls in cold climate | Foil-faced poly | Adds radiant heat reflection for energy savings |
| Uneven basement walls or floors | Dimpled membrane | Conforms to irregular surfaces, creates drainage gap |
| Basement walls with minor seepage | Dimpled membrane | Air gap allows moisture to drain instead of trapping it |
| Concrete walls with cracks and irregular shapes | Spray-on liquid barrier | Seamless application fills small cracks |
| Under new concrete slab | 10 to 15 mil poly (Stego Wrap or equivalent) | Prevents moisture wicking up through cured concrete |
Understand Perm Ratings
The perm rating measures how much moisture vapor passes through a material. Lower is better for vapor barriers.
Class I vapor retarder (0.1 perms or less)
True vapor barriers that block virtually all moisture vapor. Polyethylene sheeting, foil-faced barriers, and reinforced scrim poly all fall in this category. This is what you want for basements and crawl spaces.
Class II vapor retarder (0.1 to 1.0 perms)
Slows moisture significantly but allows some through. Some dimpled membranes fall in this range. Acceptable for wall applications where some vapor permeability is intentional.
Class III vapor retarder (1.0 to 10 perms)
Slows moisture modestly. Latex paint on drywall is a Class III retarder. Not sufficient as a standalone vapor barrier for below-grade applications.
For basement and crawl space use, always choose a Class I vapor barrier (0.1 perms or less) unless your specific application requires a dimpled membrane for drainage.
Choose the Right Thickness
Thicker barriers resist punctures, tears, and damage from foot traffic, rocks, and debris.
6 mil
Minimum code requirement in many jurisdictions. Adequate for basement wall applications behind framing where the barrier is protected from physical contact. Too thin for crawl space floors where it will be walked on during maintenance.
10 to 12 mil
Good balance of cost and durability for crawl space floors with smooth, cleared soil. Adequate for under-slab applications where the barrier will be covered by concrete.
15 to 20 mil
Professional-grade thickness for crawl space encapsulation, rocky or debris-covered soil, and any application where the barrier will see foot traffic during inspections and maintenance. This is what most encapsulation contractors use.
Our Top 5 Picks for 2026
1. Americover 20-Mil Vapor Barrier
Best Overall for Crawl Spaces and Basements
The Americover 20-mil polyethylene vapor barrier is our top overall pick for its combination of heavy-duty thickness, true Class I vapor performance, and straightforward installation. At 20 mil, it is thick enough to handle rocky crawl space floors, foot traffic during inspections, and the general abuse that below-grade barriers endure over decades of service.
The material is a virgin polyethylene resin (not recycled), which matters for long-term durability because recycled poly can contain weak points and inconsistencies. It meets ASTM E1745 Class A standards for under-slab use, making it suitable for both crawl space floors and new concrete slab pours. The perm rating is well under 0.1, providing true vapor barrier performance.
Installation is straightforward: roll out the barrier over prepared soil or against walls, overlap seams by at least 12 inches, and seal all seams with vapor barrier tape (not duct tape, which degrades underground). Extend the barrier up crawl space walls by 6 to 12 inches and secure with mechanical fasteners or adhesive. For basement wall applications, install behind framing and insulation before drywall.
Specs: 20 mil thickness, virgin polyethylene, Class I vapor retarder (under 0.1 perms), ASTM E1745 Class A, available in various roll sizes.
Pros
- ✓ 20 mil thickness handles foot traffic and rocky soil
- ✓ Virgin polyethylene for consistent quality and durability
- ✓ Meets ASTM E1745 Class A for under-slab use
- ✓ True Class I vapor retarder (under 0.1 perms)
- ✓ Expected lifespan of 20 or more years
- ✓ Works for crawl spaces, basement walls, and under slabs
Cons
- ✗ Heavier and bulkier to handle during installation than thinner options
- ✗ More expensive per square foot than basic 6-mil poly
- ✗ Requires seam tape (not included)
Best for: Most crawl space floors, under-slab installations, and basement wall applications where maximum durability matters. Our top recommendation for DIY crawl space encapsulation.
Price: $0.25 to $0.50 per square foot depending on roll size.
Best Pick: Americover 20-Mil Vapor Barrier
Check Price on Amazon2. Reflectix Foil-Faced Insulation Barrier
Best for Cold Climate Basements
The Reflectix foil-faced barrier combines a polyethylene vapor barrier with a reflective foil surface that bounces radiant heat back into the basement. This dual function makes it the best choice for finished basements in cold climates where both moisture control and energy efficiency matter.
The reflective surface provides an R-value contribution when installed with a dead air space (at least 3/4 inch gap between the foil and the wall surface). In a typical basement wall assembly with rigid foam insulation and an air gap, the Reflectix adds measurable energy savings by reflecting heat that would otherwise be lost through the foundation wall. The reflective surface also brightens dark basement spaces, which is a practical bonus during construction and ongoing use.
The material is lighter and thinner than the Americover, making it easier to handle for wall applications. However, it is not as puncture-resistant as heavier poly barriers, so it is less suitable for crawl space floors where it would be walked on. The foil surface can tear if snagged during installation, so handle with care.
Specs: Foil-faced polyethylene, reflective radiant barrier, Class I vapor retarder, available in rolls of various widths.
Pros
- ✓ Dual function: vapor barrier plus radiant heat reflection
- ✓ Improves energy efficiency in cold climate basements
- ✓ Reflective surface brightens dark spaces
- ✓ Lighter and easier to handle for wall installations
- ✓ Mildew-resistant surface
- ✓ Class I vapor retarder performance
Cons
- ✗ Foil surface can tear during installation
- ✗ Not as puncture-resistant as heavy poly (not ideal for crawl space floors)
- ✗ Higher cost than basic polyethylene sheeting
- ✗ Requires air gap for full radiant benefit
Best for: Finished basement walls in cold climates where energy efficiency is a priority. Install behind framing with rigid foam insulation for maximum benefit. See our basement insulation guide and spray foam vs rigid foam comparison for insulation options that pair with this barrier.
Price: $0.20 to $0.60 per square foot.
Best Pick: Reflectix Foil Insulation Barrier
Check Price on Amazon3. Stego Wrap 15-Mil Vapor Barrier
Best Professional-Grade for Encapsulation
Stego Wrap is the industry standard among professional crawl space encapsulation contractors. The 15-mil reinforced polyethylene with woven scrim provides exceptional tear resistance, puncture resistance, and long-term durability that basic poly cannot match.
The woven scrim reinforcement (a fabric-like mesh embedded in the polyethylene) prevents tears from propagating. If a rock or sharp object punctures the barrier, the tear stays small rather than ripping across the sheet. This is critical in crawl spaces with rocky soil, debris, or areas where technicians need to walk during HVAC maintenance, plumbing repairs, or annual inspections.
Many Stego Wrap products include antimicrobial treatment that inhibits mold and mildew growth on the barrier surface. The perm rating is well under 0.1, meeting Class I standards. It exceeds ASTM E1745 Class A requirements and is the most commonly specified barrier in professional encapsulation specifications.
The trade-off is cost: Stego Wrap costs roughly twice as much per square foot as basic polyethylene. For a professional encapsulation that is expected to last 25 or more years and be walked on regularly, the premium is justified. For a basement wall application behind drywall that will never see foot traffic, basic poly is adequate.
Specs: 15 mil reinforced polyethylene with woven scrim, antimicrobial treatment, Class I vapor retarder (under 0.1 perms), ASTM E1745 Class A, puncture-resistant.
Pros
- ✓ Woven scrim prevents tear propagation
- ✓ Handles foot traffic without damage
- ✓ Antimicrobial treatment inhibits mold on barrier surface
- ✓ 25 or more year expected lifespan
- ✓ Industry standard for professional encapsulation
- ✓ Exceeds ASTM E1745 Class A requirements
Cons
- ✗ Higher cost than basic polyethylene ($0.30 to $0.70/sq ft)
- ✗ Bulkier to handle and cut during installation
- ✗ Requires careful seaming with compatible tape
Best for: Professional-grade crawl space encapsulation, high-traffic crawl spaces, and any installation where maximum durability and longevity matter. See our crawl space encapsulation guide for how this barrier fits into a complete encapsulation system.
Price: $0.30 to $0.70 per square foot.
Best Pick: Stego Wrap 15-Mil Vapor Barrier
Check Price on Amazon4. DMX AG Dimpled Membrane
Best for Uneven Surfaces and Wall Drainage
The DMX AG dimpled membrane takes a fundamentally different approach from flat poly barriers. Instead of lying flat against the surface, the raised dimples create a continuous air gap (approximately 8mm) between the membrane and the wall or floor. This air gap serves two critical functions: it allows moisture that penetrates the barrier to drain downward rather than pooling behind it, and it allows air circulation that helps manage condensation.
This makes the DMX AG the best choice for basement walls with minor seepage or old, uneven surfaces where a flat poly barrier would trap moisture. The dimpled design conforms to irregular surfaces without bunching or folding, and the air gap prevents the trapped-moisture problems that can occur when flat poly is installed directly against a damp concrete wall.
The trade-off is a higher perm rating than flat polyethylene. Dimpled membranes are not true Class I vapor barriers. They slow moisture vapor significantly but allow some through, making them more of a moisture management system than a true vapor block. For applications where absolute vapor blocking is required (under slabs, over crawl space soil), use flat poly instead.
Specs: Dimpled HDPE membrane, approximately 8mm air gap, conforms to uneven surfaces, mechanical or adhesive installation.
Pros
- ✓ Creates drainage air gap that prevents trapped moisture
- ✓ Conforms to uneven and irregular surfaces
- ✓ Reduces condensation buildup on cold concrete
- ✓ Easy to install with mechanical fasteners or adhesive strips
- ✓ Good for both walls and as a subfloor underlayment
- ✓ Does not trap moisture behind it like flat poly can
Cons
- ✗ Higher perm rating than flat poly (not a true Class I vapor barrier)
- ✗ More expensive than basic polyethylene ($0.40 to $0.80/sq ft)
- ✗ Air gap can harbor mold if the space is not ventilated or dehumidified
- ✗ Not suitable for under-slab or crawl space floor applications
Best for: Basement walls with minor seepage or dampness where flat poly would trap moisture. Uneven or irregular basement walls in older homes. Subfloor applications under finished flooring. See our old house basements guide for specific challenges in pre-1960 foundations.
Price: $0.40 to $0.80 per square foot.
Best Pick: DMX AG Dimpled Membrane
Check Price on Amazon5. Ames Block and Wall Liquid Rubber
Best for Walls and Irregular Shapes
The Ames Block and Wall Liquid Rubber is a spray-on or brush-on elastomeric coating that forms a seamless, flexible membrane directly on concrete surfaces. Unlike sheet barriers that must be cut and fitted around pipes, ducts, corners, and irregularities, the liquid barrier goes on in a continuous coating that conforms perfectly to any shape.
The liquid penetrates into small cracks and pores in the concrete, creating a bond that sheet barriers cannot achieve. Once cured (1 to 2 days), it forms a flexible rubber membrane that moves with minor foundation settling without cracking or separating. The surface is paintable, so it can be finished to match basement walls.
The limitations are significant for below-grade use: liquid barriers have a shorter lifespan (10 to 15 years vs 20 or more years for sheet poly), they are messy to apply (spray application creates overspray, brush application is labor-intensive), and they are not suitable for floor applications or large, flat areas where sheet barriers are faster and cheaper. Use liquid barriers as a complement to sheet barriers, not a replacement.
Specs: Elastomeric liquid rubber coating, spray or brush application, flexible when cured, paintable surface, 1 to 2 day cure time.
Pros
- ✓ Seamless application with no joints or seams
- ✓ Conforms to any shape (pipes, corners, irregular surfaces)
- ✓ Penetrates and seals small cracks in concrete
- ✓ Flexible membrane moves with minor settling
- ✓ Paintable once cured
- ✓ Quick application for small or complex areas
Cons
- ✗ Shorter lifespan (10 to 15 years vs 20 for sheet poly)
- ✗ Messy to apply (overspray with sprayer, labor-intensive with brush)
- ✗ Not suitable for floors or large flat areas
- ✗ Variable perm rating depending on application thickness
- ✗ Requires clean, dry surface for proper adhesion
Best for: Basement wall sections with irregular shapes, pipe penetrations, and corners where sheet barriers cannot conform. Use alongside sheet poly barriers, not as a replacement. See our waterproof basement paint and sealers guide for how liquid barriers compare to waterproof paint products.
Price: $0.50 to $1.00 per square foot.
Best Pick: Ames Block & Wall Liquid Rubber
Check Price on AmazonInstallation Guide for Vapor Barriers
Crawl Space Floor Installation
Step 1: Prepare the surface
Remove all debris, sharp rocks, and organic material from the crawl space floor. Level any high spots and fill low spots with sand or fine gravel. A clean, relatively smooth surface prevents punctures and ensures full contact.
Step 2: Roll out the barrier
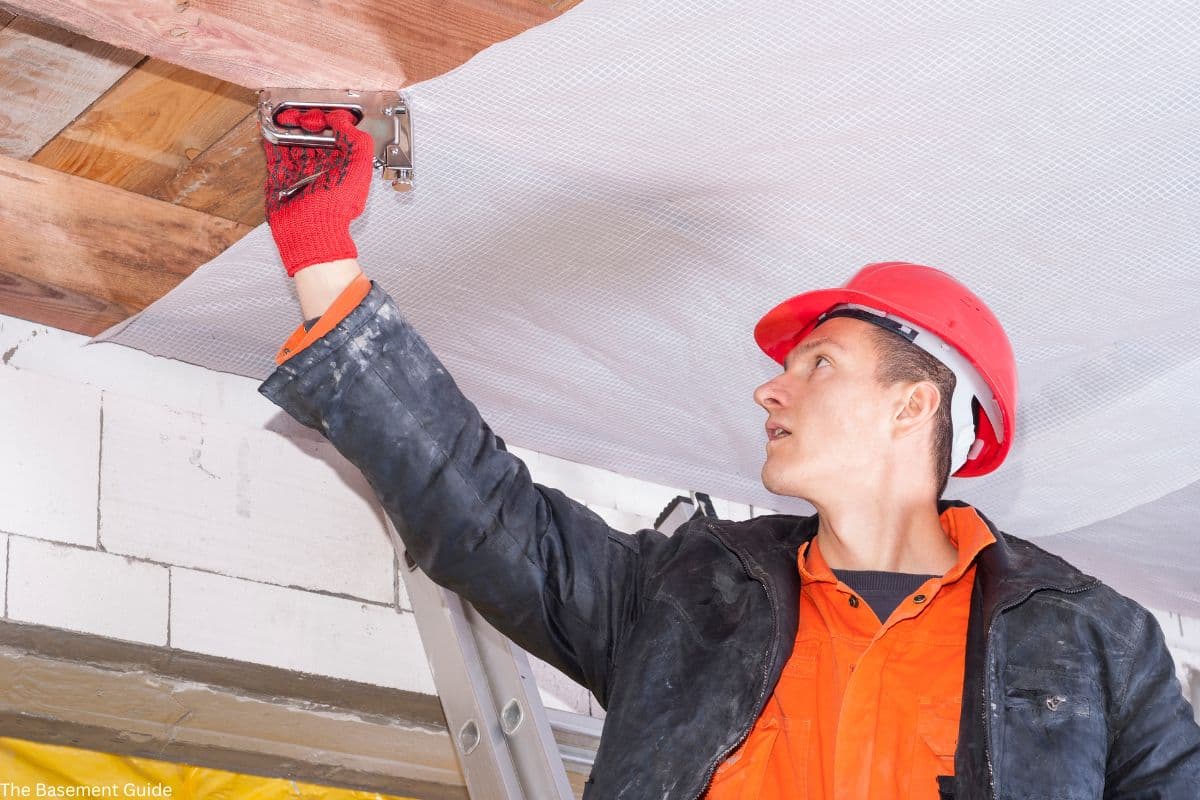
Start at the far end of the crawl space and roll the barrier toward the access point so you do not have to walk over finished sections. Extend the barrier up the crawl space walls at least 6 to 12 inches and secure with mechanical fasteners or adhesive.
Step 3: Seal all seams
Overlap all seams by at least 12 inches. Seal every seam with vapor barrier tape specifically designed for polyethylene (not duct tape, which degrades over time). Seal around all penetrations (posts, pipes, piers) with tape or mastic.
Step 4: Secure edges
Fasten the barrier to the walls using mechanical fasteners (masonry screws with washers) or construction adhesive. The barrier should be sealed tight to the wall with no gaps where air or moisture can bypass.
Basement Wall Installation
Step 1: Fix any active leaks
A vapor barrier manages moisture vapor, not liquid water. If walls have active water intrusion, address the water source first with crack injection, drainage, or exterior waterproofing. See our complete waterproofing guide.
Step 2: Install the barrier against the concrete
For flat poly or foil-faced barriers, attach directly to the concrete wall using adhesive or mechanical fasteners before framing. For dimpled membranes, the dimples face the concrete to create the air gap.
Step 3: Frame and insulate over the barrier
Install wood or metal framing over the barrier, add rigid foam or spray foam insulation, and finish with drywall. The barrier must be between the concrete and the insulation to prevent moisture from reaching the organic materials. See our basement insulation guide for insulation options.
Step 4: Do not double up vapor barriers
Install only one vapor barrier per wall assembly. Two vapor barriers (one against the concrete and one on the warm side of the insulation) can trap moisture between them and cause mold in the wall cavity.
DIY vs Professional Installation
Basic poly sheeting installation on a crawl space floor or basement walls is a manageable DIY project that takes 1 to 2 days for a typical space. You need the barrier material, vapor barrier tape, a utility knife, mechanical fasteners or adhesive, and basic tools.
Full crawl space encapsulation (barrier plus vent sealing, insulation, dehumidifier, and optional sump pump) is more complex and typically costs $3,000 to $8,000 professionally installed. Most homeowners save money by doing the barrier installation themselves and hiring professionals for the dehumidifier, drainage, and vent sealing components. See our DIY vs hiring a pro guide for help deciding.
Frequently Asked Questions
What mil thickness should I use for a vapor barrier?
For crawl space floors, use at least 10-mil polyethylene for light-duty applications and 15 to 20 mil for encapsulation systems or crawl spaces where the barrier will be walked on during maintenance. The 6-mil minimum required by some building codes is adequate for basement wall applications behind framing where the barrier is protected from physical contact, but it tears easily and is not recommended for crawl space floors. For under-slab installations beneath new concrete, use at least 10 to 15 mil rated to ASTM E1745 standards.
Do I need a vapor barrier on basement walls?
Yes, if you plan to finish your basement with framing, insulation, and drywall. Without a vapor barrier between the concrete wall and the framing, moisture vapor migrates through the concrete and reaches the organic materials (wood framing, paper-faced drywall, fiberglass insulation) where it creates conditions for mold growth. Install the barrier directly against the concrete before framing, with rigid foam insulation between the barrier and the framing for additional moisture and thermal protection. See our pre-finish audit checklist for everything to verify before finishing your basement.
Can I install a vapor barrier myself?
Yes, basic vapor barrier installation is a manageable DIY project. Rolling out polyethylene sheeting on a crawl space floor, taping seams, and securing edges takes 1 to 2 days for a typical 800 to 1,200 square foot space. Basement wall installations are similarly straightforward. You need the barrier material, vapor barrier tape (not duct tape), a utility knife, and mechanical fasteners or construction adhesive. Full crawl space encapsulation that includes vent sealing, insulation, dehumidifier installation, and drainage work is more complex and may benefit from professional installation. See our DIY vs hiring a pro guide.
What is the difference between a vapor barrier and a vapor retarder?
A vapor barrier is a Class I vapor retarder with a perm rating of 0.1 or less, meaning it blocks virtually all moisture vapor from passing through. Polyethylene sheeting, foil-faced barriers, and reinforced scrim poly are all Class I vapor barriers. A vapor retarder is a broader term that includes Class II (0.1 to 1.0 perms, which slows moisture significantly) and Class III (1.0 to 10 perms, which slows moisture modestly). For basement and crawl space applications where the goal is to stop ground moisture from entering the living space, a true Class I vapor barrier (0.1 perms or less) is recommended.
Should I put a vapor barrier under a concrete slab?
Yes. Installing a vapor barrier under a new concrete slab prevents ground moisture from wicking upward through the cured concrete via capillary action. Without a sub-slab barrier, moisture migrates continuously through the concrete and into the basement, raising humidity, causing efflorescence on the surface, and damaging any flooring installed on top of the slab. Use at least 10 to 15 mil polyethylene rated to ASTM E1745 Class A standards. This is a one-time installation that is impossible to add after the slab is poured. See our basement efflorescence guide for what happens when sub-slab moisture is not controlled.
Do I need a vapor barrier in addition to rigid foam insulation?
It depends on the insulation type. Rigid foam boards (XPS and polyiso) are themselves vapor retarders when installed in sufficient thickness (typically 1.5 inches or more of XPS achieves a perm rating under 1.0). However, rigid foam alone may not provide true Class I vapor barrier performance (0.1 perms or less). Many building scientists and building codes recommend a separate polyethylene vapor barrier against the concrete wall in addition to rigid foam insulation for below-grade applications to ensure complete moisture control. The safest approach is barrier against concrete, then rigid foam, then framing. See our basement insulation guide for detailed wall assembly recommendations.
Can a vapor barrier cause mold?
A vapor barrier installed incorrectly can create conditions for mold by trapping moisture. This happens most commonly when a flat poly barrier is installed against a damp concrete wall that has active water intrusion (not just vapor), trapping liquid water between the barrier and the wall. It also happens when two vapor barriers are installed in the same wall assembly, trapping moisture in the wall cavity with no way to dry. To avoid these problems, fix active water intrusion before installing a barrier, use a dimpled membrane instead of flat poly on walls with minor seepage, and never install two vapor barriers in the same assembly. Always pair the barrier with a dehumidifier to maintain humidity below 50 percent. See our mold prevention guide.
How long does a vapor barrier last?
Polyethylene vapor barriers last 20 or more years when properly installed and protected from physical damage and UV exposure (UV is not a concern in below-grade applications). Reinforced scrim barriers like Stego Wrap last 25 or more years due to the added tear resistance. Dimpled membranes last 20 or more years. Spray-on liquid barriers have a shorter lifespan of 10 to 15 years and may need reapplication. The most common cause of premature barrier failure is physical damage from foot traffic, stored items, or renovation work, not material degradation. Inspect your barrier annually during crawl space or basement maintenance checks.
Glossary of Vapor Barrier Terms
Vapor barrier (Class I vapor retarder)
A material with a perm rating of 0.1 or less that blocks virtually all moisture vapor from passing through. Polyethylene sheeting, foil-faced barriers, and reinforced scrim poly are all Class I vapor barriers. For below-grade basement and crawl space applications, a Class I vapor barrier is the recommended standard.
Perm rating (permeance)
A measurement of how much water vapor passes through a material, expressed in perms. Lower perm ratings indicate better vapor blocking. Class I is 0.1 perms or less. Class II is 0.1 to 1.0 perms. Class III is 1.0 to 10 perms. Measured per ASTM E96 standard.
Mil thickness
A unit of measurement equal to one-thousandth of an inch, used to describe vapor barrier thickness. A 6-mil barrier is 0.006 inches thick. A 20-mil barrier is 0.020 inches thick (approximately the thickness of a credit card). Thicker barriers resist punctures and tears better and last longer.
Polyethylene sheeting
The most common vapor barrier material for basement and crawl space use. Polyethylene is a plastic polymer that is waterproof, chemically resistant, and available in thicknesses from 4 mil to 20 mil. Virgin polyethylene (made from new resin) is more consistent and durable than recycled polyethylene.
Reinforced scrim
A woven fabric mesh embedded within polyethylene sheeting that prevents tears from propagating across the barrier. Reinforced barriers are the professional standard for crawl space encapsulation.
Dimpled membrane
A high-density polyethylene sheet with raised dimples (typically 8mm high) that create an air gap between the membrane and the wall or floor surface. The air gap allows moisture to drain and air to circulate. Dimpled membranes are not true Class I vapor barriers due to their higher perm ratings.
ASTM E1745
The American Society for Testing and Materials standard for vapor barriers used under concrete slabs. Class A is the highest rating, requiring the barrier to pass tests for tensile strength, puncture resistance, and water vapor transmission.
Vapor barrier tape
A specialized adhesive tape designed to seal seams and overlaps in polyethylene vapor barriers. Vapor barrier tape maintains adhesion in below-grade conditions for 20 or more years. Do not use duct tape, which degrades within 1 to 3 years in below-grade environments.
Capillary action
The physical process by which water moves upward through porous materials like concrete against gravity, driven by surface tension in microscopic pores. A sub-slab vapor barrier interrupts capillary action.
Encapsulation
The process of completely sealing a crawl space or basement surface with a continuous vapor barrier, sealing all vents and gaps, and installing a dehumidifier to create a conditioned space. See our crawl space encapsulation guide.
Related Guides
Crawl Space Encapsulation Guide
Basement Insulation Guide
Spray Foam vs Rigid Foam Insulation
Complete Basement Waterproofing Guide
Basement Waterproofing Cost
How to Prevent Basement Mold
Waterproof Basement Paint and Sealers
How to Finish a Basement
Pre-Finish Audit Checklist
Basement Humidity Guide
Basement Efflorescence
Old House Basements
DIY vs Hiring a Pro
Radon and Basement Waterproofing