Basement Insulation
Guide for 2026
R-values by climate zone, moisture science, material comparisons, step-by-step installation, and 2026 costs.
The Basement Guide Staff
Updated March 2026 · 35 min read
Basements can account for 20 to 30 percent of a home’s total heat loss when left uninsulated. In 2026, with energy prices remaining elevated and building codes focusing on below-grade performance, proper basement wall insulation is one of the highest-ROI improvements you can make. The right insulation approach reduces energy costs by 10 to 25 percent, eliminates cold floors and damp walls, prevents condensation-driven mold, and makes the basement comfortable enough to use as living space. The wrong approach, which usually means fiberglass batts installed directly against concrete, creates hidden mold problems that can cost thousands to remediate. This guide explains the moisture science behind basement insulation, compares every material option, walks through three proven installation methods, and breaks down costs for 2026.
Basement insulation is a distinct building science challenge from above-grade wall insulation because the thermal and moisture dynamics of a below-grade concrete assembly are fundamentally different from a wood-framed above-grade wall. Concrete foundation walls are in continuous contact with 50 to 55 degree soil year-round, which keeps them cold enough to cause condensation when warm humid interior air reaches them, regardless of outdoor temperature. This means the insulation material and its placement relative to the concrete determine not just thermal performance but whether the assembly will stay dry or generate hidden mold, making moisture management the primary design criterion rather than R-value alone. The sequencing principle that governs every successful basement insulation project is fixed: waterproofing must be complete and verified before insulation is installed, because insulating over active moisture traps water against organic materials and creates mold conditions that are expensive to remediate.
Why Insulate Your Basement?
Four clear outcomes appear consistently in the 2026 data for anyone adding basement insulation.
Energy Savings
Basement wall insulation and rim joist work typically cut total household energy use by 10 to 25 percent, depending on climate zone and existing conditions. The rim joist alone is one of the leakiest areas in most homes, and insulating it is the single highest-return energy upgrade in most basements.
Comfort and Usability
Wall and floor surface temperatures rise 8 to 15 degrees Fahrenheit with proper insulation, making the space feel warmer in winter and drier in summer. This is the difference between a basement you avoid and one you actually use.
Moisture and Mold Control
Warm surfaces stay above the dew point, reducing condensation that leads to mold growth. Condensation on cold basement walls is one of the most common causes of basement mold, and insulation solves it at the source.
Home Value
Conditioned basements with proper insulation add resale value faster than uninsulated ones in most markets. Insulation is also a prerequisite for finishing your basement into livable space. See our how to finish a basement guide and pre-finish audit checklist.
Important
All of these benefits start with fixing bulk water and air leakage before any insulation goes in. Address drainage, grading, gutters, and sump pumps first. Insulating over a wet wall traps the moisture and guarantees mold. See our complete basement waterproofing guide for how to dry your basement before insulating.
Basement Moisture Science
The Foundation of Every Insulation Job
Concrete foundation walls stay cold year-round because they sit against 50 to 55 degree soil. Warm, humid indoor air that reaches those surfaces can condense, especially in summer. Building Science Corporation research shows the safest approach keeps interior air away from cold concrete while allowing any incidental moisture to dry inward.
Key Moisture Rules for Basement Insulation in Every Climate Zone
- 1. Fix all bulk-water sources before starting. This means grading, gutters, french drains, and sump pumps must be functioning properly. Insulation installed over active water problems will fail.
- 2. Place air-impermeable, vapor semi-permeable insulation directly against the concrete. Rigid foam board (XPS or EPS) and closed-cell spray foam both meet this requirement.
- 3. Never install a Class I vapor barrier (6-mil polyethylene sheeting) on the warm side of fibrous insulation against a basement wall. This creates a moisture trap that guarantees mold growth between the vapor barrier and the cold concrete.
- 4. Allow the assembly to dry inward. Rigid foam and closed-cell spray foam control vapor transmission from the concrete while allowing very slow drying toward the interior. This is the moisture-safe approach endorsed by building science professionals.
For a detailed comparison of the two most common foam insulation types used in basements, see our spray foam vs rigid foam insulation comparison.
Code Requirements & R-Values by Climate Zone
The 2021 International Residential Code (IRC) sets minimum basement wall insulation requirements based on climate zone. Many states adopt the IRC directly, while others amend it. Always confirm local requirements with your building department before starting. See our basement permits guide for information on when permits are required for insulation and finishing projects.
| Climate Zone | Min. R-Value (Continuous Foam) | Min. R-Value (Cavity Insulation) | Example Cities |
|---|---|---|---|
| Zone 3 | R-5 | R-13 | Atlanta, Dallas, Charlotte |
| Zone 4 | R-10 | R-13 | Nashville, Raleigh, St. Louis |
| Zone 5 | R-15 | R-19 | Chicago, Boston, Denver |
| Zone 6 | R-15 | R-19 | Minneapolis, Milwaukee, Portland ME |
| Zone 7 to 8 | R-15 | R-21 | Duluth, Fairbanks, Fargo |
"Continuous" means unbroken rigid foam or spray foam against the wall with no gaps at framing members. "Cavity" refers to batt insulation placed between studs in a framed wall. The best assemblies combine both continuous foam against the concrete and cavity insulation in the stud wall for maximum performance.
Basement Insulation Materials Compared 2026
Not every insulation product works safely below grade. Materials must resist moisture, prevent condensation against cold concrete, and meet fire codes. Here is how the main options compare for basement wall applications.
| Material | R-Value/Inch | Vapor Permeance | Safe Against Basement Concrete? | Cost Per Sq Ft (Materials) |
|---|---|---|---|---|
| XPS rigid foam (extruded polystyrene) | R-5.0 | ~1.0 perm at 1 inch | Yes | $0.35 to $0.55 |
| EPS rigid foam (expanded polystyrene) | R-3.8 to R-4.4 | 2 to 5 perm at 1 inch | Yes | $0.25 to $0.45 |
| Polyiso rigid foam (polyisocyanurate) | R-5.7 to R-6.5 | ~1.0 perm at 1 inch | Use with caution (see note below) | $0.45 to $0.70 |
| Closed-cell spray foam | R-6.5 to R-7.0 | <1.0 perm at 2 inches | Yes | $1.50 to $3.00 installed |
| Open-cell spray foam | R-3.5 to R-3.8 | High (>10 perm) | No. Too vapor-open for direct concrete contact. | $0.80 to $1.50 installed |
| Fiberglass batts (alone against concrete) | R-3.2 to R-3.8 | High | No. Absorbs moisture and causes mold. | $0.15 to $0.30 |
| Mineral wool batts (alone against concrete) | R-3.8 to R-4.2 | High | No. Same condensation problem as fiberglass. | $0.40 to $0.65 |
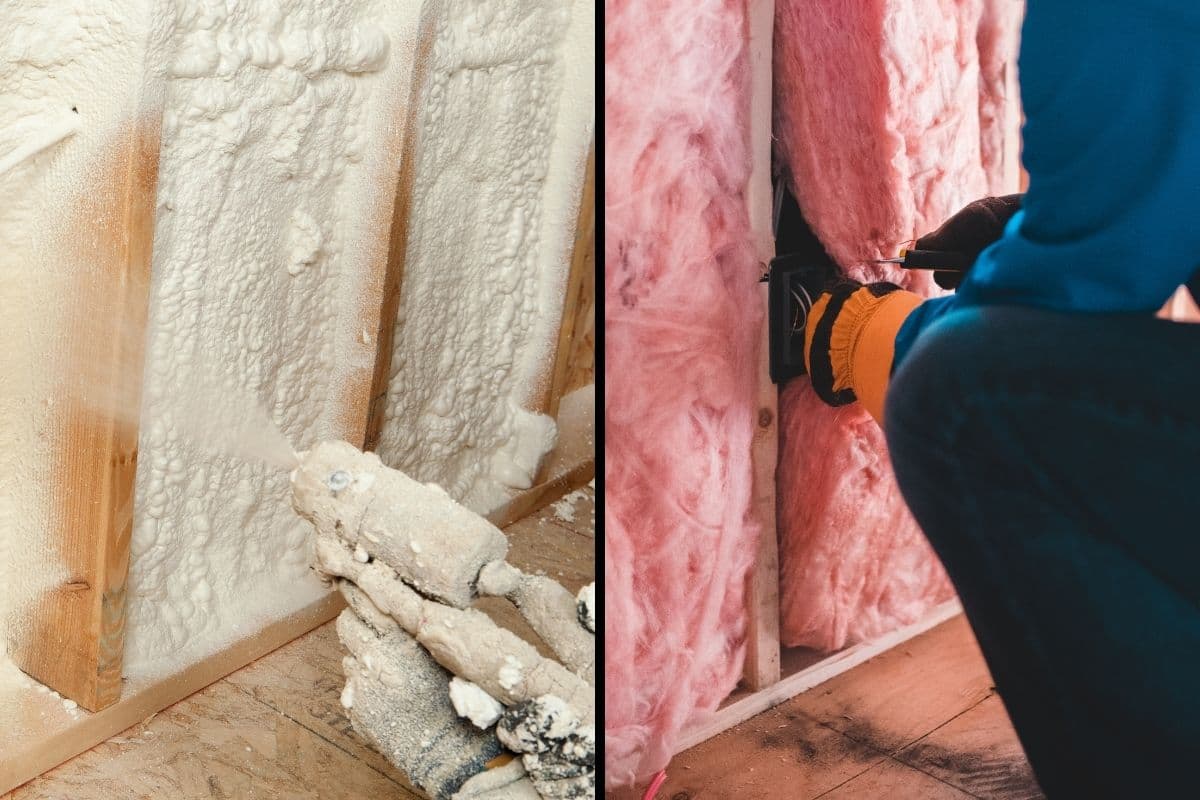
Critical Warning About Fiberglass and Mineral Wool
Fiberglass and mineral wool batts installed directly against a basement wall, with or without a polyethylene vapor barrier, are the number one cause of hidden mold in basements. The batts allow warm air to pass through and contact the cold concrete, where it condenses. The batts then absorb the condensation and stay wet, creating a perfect mold environment that is hidden behind the finished wall. Always place air-impermeable rigid foam or closed-cell spray foam against the concrete first.
Polyiso caution: Polyisocyanurate has the highest R-value per inch, but its paper or foil facers can trap moisture if installed against damp concrete. Polyiso also loses R-value at cold temperatures (below 50 degrees Fahrenheit), which is exactly the temperature range of basement walls. XPS and closed-cell spray foam are generally safer and more reliable choices for below-grade walls.
Installation Approaches
Three Proven Methods for Basement Wall Insulation
Approach 1: Rigid Foam Board + Stud Wall
This is the most common and recommended method for DIY homeowners. It combines continuous rigid foam against the concrete for moisture control with a framed stud wall for running electrical, plumbing, and hanging drywall.
Step-by-Step: Rigid Foam + Stud Wall
- 1.Resolve all bulk water issues. Ensure walls are dry for 30+ days before starting.
- 2.Cut XPS or EPS rigid foam boards to fit between floor slab and rim joist area. Use 1.5-inch to 2-inch thick panels for Zones 3 through 4, or 2-inch to 3-inch for Zones 5 through 8.
- 3.Attach panels to concrete using construction adhesive (not mechanical fasteners that penetrate the waterproofing).
- 4.Tape all seams with foil tape or housewrap tape to create a continuous air barrier.
- 5.Frame a 2x4 stud wall half an inch off the foam surface (no direct contact with concrete at bottom plate).
- 6.Optionally add unfaced fiberglass or mineral wool batts in the stud cavities for additional R-value.
- 7.Install half-inch drywall as the thermal barrier (code requirement over foam). Do NOT install a poly vapor barrier.
Approach 2: Closed-Cell Spray Foam Only
Closed-cell spray foam applied directly to the concrete wall creates an air barrier, vapor retarder, and insulation layer in a single application. Two inches of closed-cell spray foam delivers approximately R-13 and a vapor permeance below 1.0 perm, meeting code in most climate zones.
This approach works best for irregularly shaped walls, stone foundations, and situations where space is limited. The main drawback is cost, which typically runs two to three times more than rigid foam board per square foot installed.
Pros of Spray Foam
- ✓Seamless air and vapor barrier in one step
- ✓Conforms to irregular surfaces and stone foundations
- ✓Highest R-value per inch (R-6.5 to R-7)
- ✓No separate taping or sealing needed
Cons of Spray Foam
- ✗Two to three times the cost of rigid board
- ✗Requires professional installation in most cases
- ✗Off-gassing concerns during and shortly after application
- ✗Difficult to inspect wall behind foam once applied
Approach 3: Hybrid Assembly (Foam + Batts)
The hybrid method combines rigid foam or spray foam against the concrete with fiberglass or mineral wool batts in a stud wall cavity. This approach lets you meet high R-value requirements (Zones 5 through 8) more affordably than using foam alone.
For example, in Zone 5 (R-15 minimum continuous): Install 2 inches of XPS (R-10) against the concrete, frame a 2x4 wall, and fill cavities with R-13 unfaced fiberglass batts. Total wall R-value: approximately R-23, well above the code minimum.
Rim Joist Insulation
The Most Overlooked Energy Loss Point
The rim joist (also called the band joist) sits on top of the foundation wall where the floor framing meets the sill plate. It is one of the leakiest areas in any home. Air sealing and insulating the rim joist is the single highest-return insulation upgrade in most basements.
How to Insulate Rim Joists
- 1.Cut rigid XPS foam to fit snugly in each joist bay (measure each bay individually as they vary).
- 2.Apply a bead of foam-compatible construction adhesive around the perimeter of each piece.
- 3.Press the foam into the joist bay against the rim joist.
- 4.Seal all edges with canned spray foam to create an airtight seal.
- 5.Alternatively, apply 2 to 3 inches of closed-cell spray foam directly to the rim joist area for a faster, more reliable seal.
Recommended Products
Top-Rated Insulation Products for Basement Walls
These are the products most commonly recommended by building science professionals for below-grade wall insulation. We have included affiliate links for convenience.
Owens Corning FOAMULAR XPS Rigid Foam Boards
R-5 per inch, moisture resistant, easy to cut and install. The most widely available XPS board for basement wall insulation projects.
View on Amazon →PRO GRADEClosed-Cell Spray Foam Insulation Kits
DIY-friendly two-component kits for rim joists and small wall areas. Delivers R-6.5 per inch with built-in vapor barrier properties.
View on Amazon →ESSENTIAL SUPPLYRigid Foam Seam Tape and Construction Adhesive
Foil tape and foam-safe adhesive for sealing rigid board seams and attaching panels to concrete. Critical for creating a continuous air barrier.
View on Amazon →Cost Breakdown
What Basement Insulation Actually Costs in 2026
Costs vary widely based on insulation type, wall area, climate zone requirements, and whether you hire a professional or do it yourself. The table below shows typical installed costs for a standard 1,000-square-foot basement (approximately 680 square feet of wall area).
| Method | DIY Cost | Pro Installed | R-Value Achieved |
|---|---|---|---|
| 2" XPS + Stud Wall + Drywall | $1,200 – $2,000 | $3,500 – $6,000 | R-10 to R-23 |
| Closed-Cell Spray Foam (2") | N/A (pro only) | $2,500 – $5,000 | R-13 |
| Spray Foam + Stud + Drywall | N/A (pro only) | $5,000 – $9,000 | R-13 to R-26 |
| Rim Joist Only (XPS + Canned Foam) | $150 – $400 | $500 – $1,200 | R-10 to R-15 |
Money-Saving Tip
The rim joist project is the best bang-for-buck insulation upgrade. A DIY rim joist insulation job typically costs under $400 in materials and can cut heating bills by 5 to 10 percent on its own.
DIY vs. Hiring a Professional
When to Do It Yourself and When to Call a Pro
Good DIY Candidates
- ✓Rim joist insulation with rigid foam and canned spray foam
- ✓Rigid foam board installation on flat poured concrete walls
- ✓Framing a stud wall and installing unfaced batts
- ✓Small DIY spray foam kits for gaps and rim joists
Hire a Professional For
- ✓Full-wall closed-cell spray foam application
- ✓Stone or rubble foundations (irregular surfaces)
- ✓Active water problems that need waterproofing first
- ✓Electrical and plumbing rough-in within the stud wall
- ✓Drywall installation and finishing
Common Insulation Mistakes to Avoid
Errors That Lead to Mold, Moisture, and Wasted Money
- ✗Fiberglass batts against concrete: Absorbs moisture, traps condensation, and breeds mold behind the wall within 1 to 3 years.
- ✗Poly vapor barrier on warm side: Creates a moisture sandwich. Vapor from concrete cannot dry in either direction, guaranteeing mold growth.
- ✗Insulating over active leaks: Insulation will not stop water. Fix all water intrusion before insulating.
- ✗Skipping the rim joist: The rim joist is the leakiest part of the building envelope. Leaving it uninsulated negates much of the wall insulation value.
- ✗Not taping foam seams: Untaped rigid foam joints leak air, reducing the effective R-value and allowing moisture to reach the concrete.
- ✗Wood framing touching concrete: Bottom plates in direct contact with concrete wick moisture and rot. Use treated lumber or a sill gasket.
Which Insulation Approach Is Right for Your Basement?
| Your Situation | Recommended Approach | Why |
|---|---|---|
| Flat poured concrete walls, DIY project, budget under $2,000 | Rigid XPS foam board plus stud wall | Most cost-effective moisture-safe method, fully DIY-capable |
| Stone or rubble foundation with irregular surface | Closed-cell spray foam applied by professional | Only material that conforms to irregular surfaces without gaps |
| Limited wall-to-wall space, cannot afford to lose inches | Closed-cell spray foam (highest R per inch) | Maximizes R-value in minimum thickness |
| Zone 5 or higher, targeting R-20 or above | Hybrid: rigid foam plus unfaced batts in stud cavity | Most affordable way to exceed code minimum in cold climates |
| Basement to be finished as living space | Rigid foam plus stud wall plus drywall | Code-compliant assembly that is moisture-safe and finish-ready |
| Unfinished basement, want energy savings only | Rim joist only, skip walls | Rim joist delivers 5 to 10 percent energy savings at lowest cost |
| Active water intrusion present | Do not insulate yet — waterproof first | Insulating over active moisture guarantees mold |
| Old house with stone foundation, planning to finish | Professional closed-cell spray foam assessment first | Stone foundations have unpredictable moisture behavior |
| Basement currently insulated with fiberglass against concrete | Remove fiberglass, inspect for mold, reinstall correctly | Fiberglass against concrete will have caused moisture damage |
| Planning to add radiant floor heat | Insulate walls and under slab before radiant install | Under-slab insulation prevents heat loss downward into soil |
| Cold climate, pipes freezing in exterior walls | Insulate rim joist and exterior wall sections first | Rim joist and exterior wall sections are highest freezing risk |
| Basement used as home gym or workshop, no plans to finish | Rigid foam board plus drywall thermal barrier | Code requires thermal barrier over foam regardless of finish level |
Frequently Asked Questions
What is the best insulation for basement walls?
Rigid XPS foam board applied directly against the concrete wall at 1.5 to 2 inches thick is the best option for most homeowners because it controls moisture, provides continuous R-value, meets building code requirements in most climate zones, and is DIY-friendly with standard tools. XPS delivers R-5 per inch, creating an air-impermeable and vapor semi-permeable layer that keeps warm indoor air from contacting the cold concrete surface where condensation would otherwise form. Closed-cell spray foam is the premium alternative, offering R-6.5 to R-7 per inch and a seamless air and vapor barrier in a single application that conforms to irregular surfaces and stone foundations without seams to tape. The tradeoff is cost: closed-cell spray foam installed professionally runs $1.50 to $3.00 per square foot versus $0.35 to $0.55 for XPS board materials. For most flat poured concrete walls, XPS board with taped seams followed by a framed stud wall provides excellent performance at a fraction of the spray foam cost. See our spray foam vs rigid foam insulation comparison for a detailed side-by-side analysis.
Can you use fiberglass batts in a basement?
Fiberglass batts should never be installed directly against a basement wall under any circumstances, because they absorb moisture from condensation on the cold concrete surface, stay wet, and create the persistent damp organic environment that mold requires to grow. The mold develops inside the batt and behind the finished wall where it is hidden from view until it has spread extensively, at which point remediation requires tearing out the entire finished wall assembly. This is the single most common and expensive basement insulation mistake, and it occurs because fiberglass is the default insulation material most homeowners and even some contractors reach for habitually without understanding the below-grade moisture dynamics. However, unfaced fiberglass or mineral wool batts can be safely used in a stud wall cavity if rigid foam or closed-cell spray foam is installed against the concrete first, because in that configuration the cold concrete surface is separated from the fibrous insulation by the foam layer. The foam handles the moisture control function; the batts add R-value in the stud cavity without contacting any condensation-prone surface. See our how to prevent basement mold guide for the full picture of how insulation choices affect mold risk.
Do I need a vapor barrier in my basement?
No, and installing a Class I vapor barrier (6-mil polyethylene sheeting) on the warm side of basement wall insulation is one of the most damaging mistakes you can make in a below-grade assembly. Polyethylene on the interior face of basement insulation creates a moisture sandwich: water vapor from the concrete cannot pass through the poly to dry inward, so it accumulates between the poly and the concrete until mold grows in that trapped moisture zone. Rigid XPS foam board and closed-cell spray foam both act as vapor retarders with permeance values between 0.5 and 2.0 perms at typical thicknesses, which is sufficient to control vapor flow from the concrete while still allowing very slow inward drying when conditions permit. This vapor-retarding-but-not-vapor-impermeable performance is exactly what Building Science Corporation and most building science authorities recommend for below-grade wall assemblies. If you are finishing the basement and want moisture protection for the drywall, a dimple mat or the foam layer itself provides that protection without the mold trap that polyethylene creates. See our best vapor barriers guide for where vapor barriers are appropriate in basement applications versus where they cause harm.
How much does it cost to insulate a basement?
For a standard 1,000-square-foot basement with approximately 680 square feet of wall area, DIY rigid foam board plus a stud wall and drywall typically costs $1,200 to $2,000 in materials, making it one of the highest-return DIY projects available. Professional installation of the same rigid foam system runs $3,500 to $6,000 including labor, materials, and drywall. Closed-cell spray foam professionally applied at 2 inches costs $2,500 to $5,000 for the foam alone, and $5,000 to $9,000 if a stud wall and drywall finishing are included. Rim joist insulation alone, the single highest-return energy upgrade in most basements, costs $150 to $400 for a DIY job or $500 to $1,200 professionally installed. The energy savings from a properly insulated basement typically run $300 to $600 per year in cold climate zones, putting the payback period for DIY rigid foam installation at 2 to 4 years and professional installation at 6 to 10 years. See our basement finishing cost guide for how insulation fits into a complete basement finishing budget.
Should I insulate my basement ceiling instead of the walls?
Ceiling insulation and wall insulation serve different purposes and the choice between them depends on whether you want to condition the basement space or keep it unconditioned. Ceiling insulation (between the basement ceiling joists) separates the basement from the heated living space above, keeping the upstairs warm while leaving the basement cold and unconditioned. This approach makes sense for unfinished basements used only for mechanical equipment and storage where the basement temperature does not matter, and it is substantially cheaper than insulating the walls. Wall insulation brings the entire basement into the conditioned envelope of the home, making it warmer, drier, and suitable for use as livable space, and it also protects the pipes, mechanical equipment, and stored items in the basement from temperature extremes. For any basement you plan to finish, use regularly, or convert to living space, wall insulation is the correct approach. Ceiling insulation can be added later as a sound control measure between floors even after wall insulation is in place, but it cannot substitute for wall insulation if the goal is a conditioned, usable basement.
What R-value do I need for basement walls?
The minimum R-value required depends on your climate zone under the 2021 International Residential Code. Zone 3 (Atlanta, Dallas, Charlotte) requires R-5 continuous foam or R-13 cavity insulation. Zone 4 (Nashville, Raleigh, St. Louis) requires R-10 continuous or R-13 cavity. Zones 5 and 6 (Chicago, Boston, Minneapolis) require R-15 continuous or R-19 cavity. Zones 7 and 8 (Duluth, Fairbanks) require R-15 continuous or R-21 cavity. Many homeowners and building science professionals recommend exceeding the code minimum by one level because the marginal cost of additional foam thickness is modest while the comfort and energy savings benefits are significant, particularly in Zones 5 and above where basement walls represent a meaningful thermal bridge. Always confirm local requirements with your building department before starting, as some states adopt amended versions of the IRC with different requirements. See our basement permits guide for when permits are required for insulation projects in your jurisdiction.
Glossary
R-value
A measure of a material's resistance to heat flow, where a higher number indicates better insulating performance per inch of thickness. R-value is the primary metric used in building codes to specify minimum insulation requirements by climate zone, and for basement walls it must be achieved with moisture-safe materials that will not degrade or promote mold when installed against cold concrete. The code-required R-value for basement walls ranges from R-5 continuous in Zone 3 to R-15 continuous in Zones 5 through 8. See the R-value by climate zone table in this guide for the full code requirements.
XPS (Extruded Polystyrene)
A rigid foam insulation board manufactured by extruding polystyrene resin through a die under heat and pressure, producing a closed-cell structure with R-5 per inch and a vapor permeance of approximately 1.0 perm at 1 inch thickness. XPS is the most widely recommended rigid foam for basement wall insulation because its closed-cell structure resists moisture absorption, its vapor permeance is in the semi-permeable range that allows slow inward drying without letting significant moisture through, and it is widely available at building supply stores. The most common residential basement application is 2-inch XPS boards (R-10) installed directly against the concrete and taped at all seams before a stud wall is framed in front.
EPS (Expanded Polystyrene)
A rigid foam insulation board made from expanded polystyrene beads fused together, producing a slightly less dense closed-cell structure than XPS with R-3.8 to R-4.4 per inch and a vapor permeance of 2 to 5 perm at 1 inch thickness. EPS is somewhat more vapor-open than XPS, which can be an advantage in assemblies that need more drying potential toward the interior, and it costs slightly less per square foot than XPS for equivalent thickness. EPS is a code-compliant choice for basement walls and is safe when installed directly against concrete, though slightly more thickness is needed to achieve the same R-value as XPS.
Closed-cell spray foam
A two-component spray-applied insulation system that expands to fill gaps and conforms to irregular surfaces, curing to a rigid closed-cell foam with R-6.5 to R-7 per inch and a vapor permeance below 1.0 perm at 2 inches. Closed-cell spray foam applied directly to concrete creates an air barrier, vapor retarder, and insulation layer in a single application without seams, making it the best option for stone or rubble foundations, irregularly shaped walls, and applications where space is too limited for rigid board plus a stud wall. The primary disadvantage is cost at $1.50 to $3.00 per square foot installed, which is two to three times the material cost of XPS board. See our spray foam vs rigid foam insulation comparison for a full cost and performance comparison.
Continuous insulation
An insulation layer that runs uninterrupted across the entire wall surface without gaps at framing members, which is required to prevent thermal bridging through the studs or joists that interrupt cavity insulation. Building codes specify R-values for continuous insulation separately from cavity insulation because a stud wall with R-15 batts has an effective whole-wall R-value significantly lower than R-15 once the thermal bridging through the wood framing is accounted for. For basement walls, the continuous insulation requirement is met by the rigid foam or spray foam layer applied directly to the concrete before any stud wall is framed in front of it.
Vapor permeance (perm)
A measure of how readily water vapor passes through a material, expressed in perms where 1 perm indicates that one grain of water vapor passes through one square foot of material per hour under a specific pressure difference. Materials with permeance above 10 perms are vapor-open (fiberglass batts), between 1 and 10 perms are vapor-variable or semi-permeable (EPS foam at typical thicknesses), and below 1 perm are vapor retarders (XPS, closed-cell spray foam, polyethylene sheeting). For basement wall insulation, the target is a material with permeance in the 0.5 to 2.0 perm range that controls vapor flow from the concrete while still allowing slow inward drying of any incidental moisture.
Rim joist (band joist)
The structural framing member that sits on top of the foundation wall at the perimeter of the first floor, forming the outer edge of the floor framing system where the floor joists are attached. The rim joist is one of the most significant sources of air leakage and heat loss in any home because it is a thin wood member sandwiched between the cold exterior and the warm interior with minimal or no insulation in most existing homes. Insulating the rim joist with rigid XPS foam cut to fit each joist bay and sealed with canned spray foam is the single highest-return energy upgrade available in most basements, often reducing heating bills by 5 to 10 percent for a DIY cost of $150 to $400.
Thermal bridging
The transfer of heat through a structural element that bypasses the insulation layer, reducing the effective thermal resistance of the wall assembly below what the insulation R-value alone would suggest. In basement walls, thermal bridging occurs through wood studs in a standard framed wall where R-15 cavity insulation in the stud bays is interrupted every 16 inches by a wood stud with an effective R-value of approximately R-1.25 per inch. Installing continuous rigid foam against the concrete before framing the stud wall eliminates thermal bridging through the framing by ensuring the entire wall surface is covered by an unbroken insulation layer.
Dew point
The temperature at which air becomes saturated with water vapor and condensation forms on surfaces that are at or below that temperature. In basements, condensation forms when warm humid interior air contacts the cold concrete wall surface, which stays near the 50 to 55 degree soil temperature year-round. Installing insulation directly against the concrete raises the temperature of the concrete surface relative to the interior air, keeping it above the dew point and eliminating the condensation that would otherwise wet the surface and support mold growth.
Related Guides
On thebasement.guide
Spray Foam vs Rigid Foam Insulation
A detailed performance and cost comparison of the two moisture-safe insulation materials approved for direct contact with basement concrete walls.
Complete Basement Waterproofing Guide
The waterproofing reference that must be consulted before any insulation is installed, covering every method for resolving moisture intrusion that would otherwise be trapped by insulation.
Basement Waterproofing Cost 2026
What professional waterproofing costs in 2026, relevant for budgeting the waterproofing phase that must precede insulation in any basement with moisture history.
How to Prevent Basement Mold
How insulation material choice and installation sequence affect mold risk in below-grade spaces, and the moisture management program that keeps a properly insulated basement mold-free.
How to Finish a Basement
The step-by-step finishing guide where insulation is one of the first and most critical steps in the sequence before any drywall, flooring, or electrical work begins.
Basement Finishing Cost 2026
How insulation fits into a complete basement finishing budget alongside framing, drywall, electrical, and flooring.
Pre-Finish Audit Checklist
The complete verification checklist that must be completed before insulation and finishing materials are installed, including moisture testing that confirms the basement is dry enough to insulate safely.
Basement Permits Guide
When permits are required for insulation and finishing projects, what inspections are involved, and how to navigate the permitting process for below-grade work.
Best Vapor Barriers
Where vapor barriers are and are not appropriate in basement assemblies, with product recommendations for the applications where they do belong.
French Drain Cost 2026
What interior drainage system installation costs, the waterproofing prerequisite for any basement with active water intrusion before insulation can proceed.
Sump Pump Buying Guide
How to choose the sump pump that keeps a waterproofed basement dry enough to insulate and finish safely.
Basement Humidity Guide
How to maintain the humidity levels that protect insulation performance and prevent condensation from forming on any surfaces that remain below the dew point after insulation is installed.
Old House Basements
Insulating and waterproofing basements in pre-1950 homes with stone, rubble, or early poured concrete foundations that require different approaches than modern poured concrete walls.
Radon and Basement Waterproofing
How the sealing and air-barrier work in a properly insulated basement also reduces radon entry pathways, making insulation and radon mitigation complementary goals.
From Our Network
Septic System Maintenance Checklist
For homes where the basement mechanical room houses equipment connected to a septic system, proper insulation of the basement space protects pipes and equipment from temperature extremes that affect septic system performance in cold climates.
Best Septic-Safe Cleaning Products 2026
When insulating and finishing a basement that includes a laundry area or utility sink draining to a septic system, the cleaning products used in those spaces affect the septic system's bacterial health.
External Resource
Get Free Basement Insulation Quotes
Connect with top-rated basement contractors in your area. Compare quotes and save.